- Joined
- Sep 22, 2023
- Messages
- 704
- Location
- Tennessee
- Vehicle Details
- Chameleon 1995 Thunderbird LX 4.6
When I bought my car, the original SecuriCode keypad was fairly damaged. The trim piece that fit it to the door was shattered and the retaining clip had fallen down inside the door. The buttons were also heavily worn. Thanks to the busted trim, water was getting inside the door and leaking into the cabin. A quick search of the internet turned up no used keypads, so I taped it off until I could figure out what to do with it.
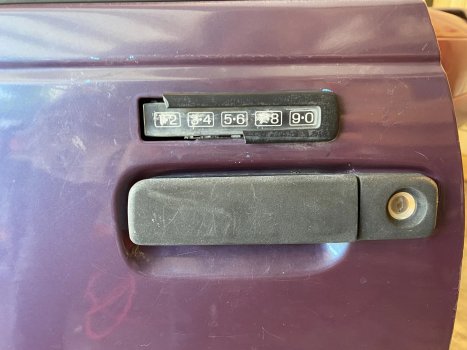
Luckily enough, both the trunk hinge sticker and the owner's manual card were still intact, so I had the factory code. The keypad worked correctly despite the damage so I knew there was hope for it. I took some measurements of the hole on the door and went off to my local pull-a-part. There I found a second generation Taurus LX with the keypad fitted. The buttons were destroyed so it was no good for me, but I was able to determine the MN12 and Taurus keypads used the same size mounting hole and retaining clip. It also helps that I prefer the Taurus keypad to the MN12 one by a lot.
And with that, off to Fleabay I went. I found a NOS backlit keypad with weather seal for a first generation Taurus SHO, so when it arrived I got to work. Both the first and second generation Tauruses used the same keypad, so they will all fit it. There were some modifications that had to be made that I'll detail below.
Steps to follow:
1.) Raise window and remove interior door panel (remove handle trim, disconnect switches and plugs, remove courtesy light lens, unscrew both screws, and gently lift panel off).
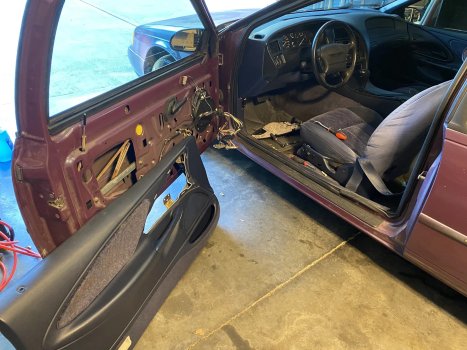
2.) Disconnect the grey 8-pin SecuriCode keypad plug from the connector and remove the three plastic rivets from the top left of the door. The third rivet is mounted to the top of the window track and cannot be seen. You can release it by reaching up into the door and pulling the wiring loom out towards the exterior side of the door.
3.) Remove the retaining clip from the keypad by sliding it towards the front of the car. Do not lose this clip as you will need it for installation.
4.) Pull the keypad out from the exterior side of the door and fish the wiring harness out through the mounting hole.
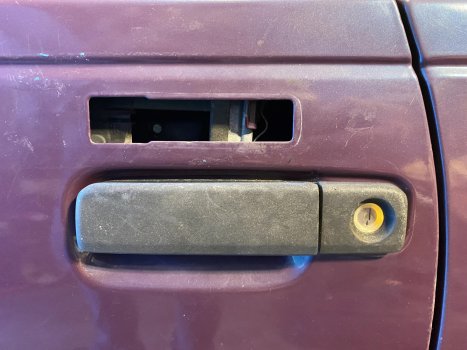
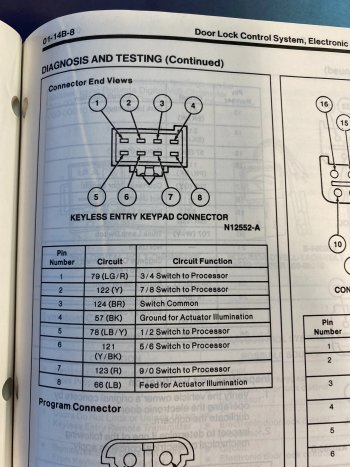
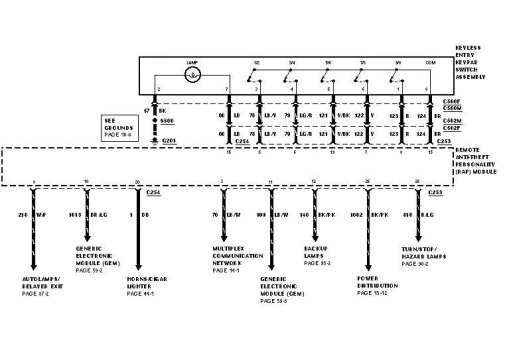
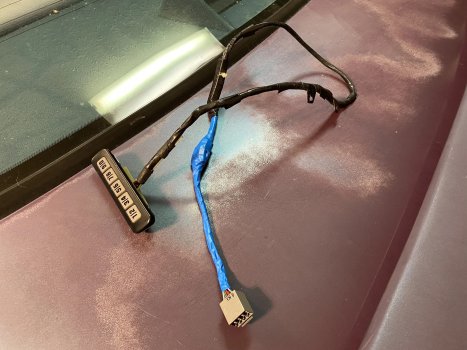
5.) Here's where the fun begins. The MN12 and the Taurus used different connectors on their keypads, but the wiring matches. The pinouts are below. All you have to do is snip the Taurus plug off the new keypad and transplant the MN12 plug to it. Make sure you snip the wires evenly and do not cut off any of the relays or resistors in the loom.
The pins are in different positions but the wires are all the same colours. Match each wire up, solder or crimp them, and heat shrink it. And don't forget to leave enough slack on the MN12 side to run the harness to the connector.
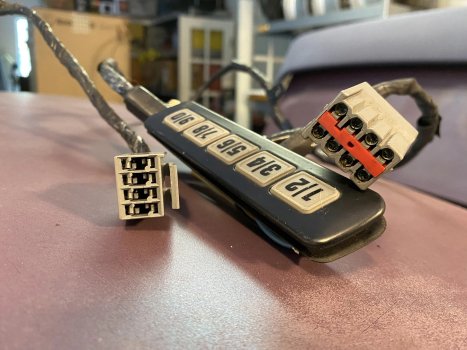
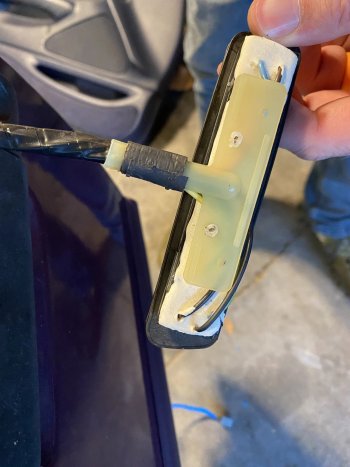
6.) Untape and remove the plastic shield on the back of the new keypad. I taped over the wires on the back of the keypad as a precaution, but you should be good as long as the epoxy is still solid.
7.) Feed the wiring harness through the mounting opening and around the back of the window track. You'll want to route the loom around the side of the track closest to the door latch. Make sure it does not interfere with the window track or regulator along with the door lock mechanisms.
8.) Ziptie the harness to the door frame and plug the harness into the connector. Reattach the driver's window switch temporarily. Roll the window up and down to ensure the harness won't get caught in it. Unplug the switch once you have confirmed it is functioning correctly.
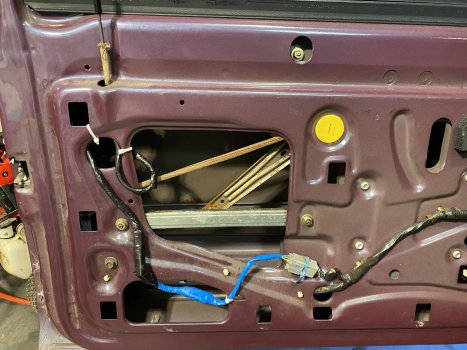
9.) Test the keypad by entering the factory code followed by the 3/4 and 5/6 buttons. Both doors should unlock and the trunk should pop. Also test the 7/8 - 9/0 feature to make sure all doors lock correctly.
10.) Replace the door panel and admire your handiwork.
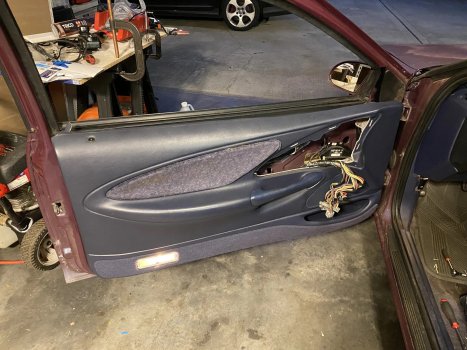
Here's what the finished product should look like. I'm incredibly happy that the backlighting matches the illuminated entry light around the lock cylinder.
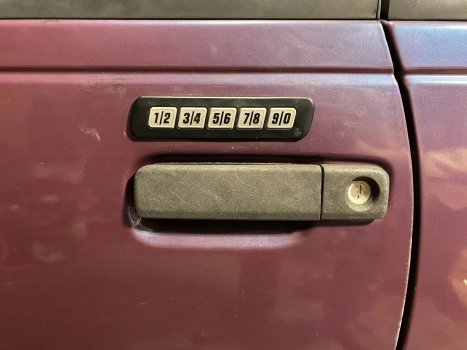
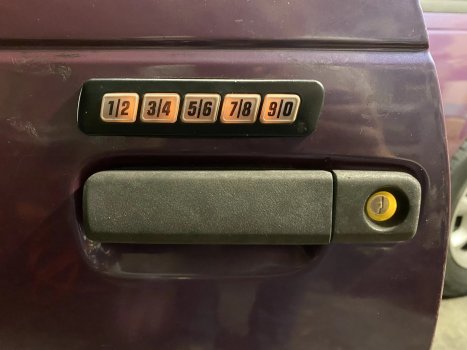
And here it is in action.
I hope this helps someone. Feel free to reply here with any questions.
(originally posted at TCCoA on September 1, 2022)

Luckily enough, both the trunk hinge sticker and the owner's manual card were still intact, so I had the factory code. The keypad worked correctly despite the damage so I knew there was hope for it. I took some measurements of the hole on the door and went off to my local pull-a-part. There I found a second generation Taurus LX with the keypad fitted. The buttons were destroyed so it was no good for me, but I was able to determine the MN12 and Taurus keypads used the same size mounting hole and retaining clip. It also helps that I prefer the Taurus keypad to the MN12 one by a lot.
And with that, off to Fleabay I went. I found a NOS backlit keypad with weather seal for a first generation Taurus SHO, so when it arrived I got to work. Both the first and second generation Tauruses used the same keypad, so they will all fit it. There were some modifications that had to be made that I'll detail below.
Steps to follow:
1.) Raise window and remove interior door panel (remove handle trim, disconnect switches and plugs, remove courtesy light lens, unscrew both screws, and gently lift panel off).

2.) Disconnect the grey 8-pin SecuriCode keypad plug from the connector and remove the three plastic rivets from the top left of the door. The third rivet is mounted to the top of the window track and cannot be seen. You can release it by reaching up into the door and pulling the wiring loom out towards the exterior side of the door.
3.) Remove the retaining clip from the keypad by sliding it towards the front of the car. Do not lose this clip as you will need it for installation.
4.) Pull the keypad out from the exterior side of the door and fish the wiring harness out through the mounting hole.

5.) Here's where the fun begins. The MN12 and the Taurus used different connectors on their keypads, but the wiring matches. The pinouts are below. All you have to do is snip the Taurus plug off the new keypad and transplant the MN12 plug to it. Make sure you snip the wires evenly and do not cut off any of the relays or resistors in the loom.
The pins are in different positions but the wires are all the same colours. Match each wire up, solder or crimp them, and heat shrink it. And don't forget to leave enough slack on the MN12 side to run the harness to the connector.


6.) Untape and remove the plastic shield on the back of the new keypad. I taped over the wires on the back of the keypad as a precaution, but you should be good as long as the epoxy is still solid.

7.) Feed the wiring harness through the mounting opening and around the back of the window track. You'll want to route the loom around the side of the track closest to the door latch. Make sure it does not interfere with the window track or regulator along with the door lock mechanisms.
8.) Ziptie the harness to the door frame and plug the harness into the connector. Reattach the driver's window switch temporarily. Roll the window up and down to ensure the harness won't get caught in it. Unplug the switch once you have confirmed it is functioning correctly.

9.) Test the keypad by entering the factory code followed by the 3/4 and 5/6 buttons. Both doors should unlock and the trunk should pop. Also test the 7/8 - 9/0 feature to make sure all doors lock correctly.
10.) Replace the door panel and admire your handiwork.

Here's what the finished product should look like. I'm incredibly happy that the backlighting matches the illuminated entry light around the lock cylinder.


And here it is in action.
I hope this helps someone. Feel free to reply here with any questions.
(originally posted at TCCoA on September 1, 2022)
Last edited:
