The "not taking my own advice" build thread

MadMikeyL

Administrator
Joined
Sep 12, 2023
Messages
362
Location
Tinton Falls, NJ
Country flag
09-09-2023, 10:20 PM

Original post, October 24, 2014
So a little background on my 1991 Mercury Cougar to understand why I'm doing all this. My mom bought the car new in 1991, it is a 1991 Mercury Cougar LS, which came with a 5.0V8, and was originally red with gray cloth interior. In 1994 it took a good hit to the LF corner, and was brought to a supposedly very good body shop to get repaired. My mom used it as her daily driver from 1991 until 1998, when at 206K miles it threw a serpentine belt and left her on the side of the road. I was 16 at the time, and already loved this car from all the childhood memories, including annual week-long road trips that I used to take with my mom in the summer every year. I begged her not to get rid of it, so she had it towed home, gave me the keys and the title, and said if I got it running I could have it. A little wrenching later and about $125 is parts and I had myself a V8 powered coupe for my first car! I drove the car for that first year, just building up even more great memories with it. When I was 18, I lost my license for a while, so I gave (loaned) the car to my cousin, who had just gotten hers. She drove it for about 6 months, then got into a minor accident in a parking lot with it where the front bumper cover got ripped off, a dent in the fender, and a couple broken lights. At the time I was going to college, and working part time at a Maaco body shop, so I took the car back from her, counted my lucky stars that it was nothing major, fixed the damage, grafted in side scoops from a 99 Mustang, and painted the whole car black with silver racing stripes and "ELIMINATOR" painted on the quarter panels. Probably not the direction I would have taken with it now, but it has become part of the car's identity, so while it will be redone better, it will keep the same scheme.

So the car got repainted, but it still had the original engine, which at this point had over 230K miles on it. When I was 19 I got a job at a mechanic shop that did Mustang performance work, so in the process of learning there, I decided it would be a good time to do some engine work. I bought a low-mileage short-block out of a 95 Mustang, swapped on some GT40 iron heads, an E-303 cam, and a 3000rpm stall converter. I also swapped in a set of black leather SC seats. At the time, I really didn't know what I was doing, and was working with what parts I could get for cheap, so it was not a well thought out package, and the car still wasn't that fast, but it looked good, and now it sounded pretty mean too with the cam! Anyway, I drove the car like that for about 2 years, until one day on the way from North Carolina back up to NJ, the motor lost oil pressure and started knocking. I had a buddy with a truck rent a U-Haul tow dolly and we towed the car back to my mom's house in NJ, where it sat in the garage untouched for several years.

Eventually I had enough money to put together a decent engine for the car, so I brought it to the shop I was working at and went at it. I got a 351W block, sent it out to get bored .030" over, and built myself a budget 393 stroker with some ported Holley systemax heads and a Typhoon intake. At the same time, the auto came out and the car got converted to an M5R2, the cracked gray dash was swapped out to a nice black one, the front suspension got rebuilt, and the car got a set of SC springs and sway bars, and some 17x9 Cobra Rs. Get everything together, and the engine smokes and burns a ton of oil. Compression check showed 190psi on all cylinders, so it couldn't be the rings, tried new valve seals, different rocker arms, adjustable guide plates thinking maybe the rockers were side-loading the valves, catch can for the PCV system, new intake gaskets thinking that maybe it was sucking oil up from the valley, nothing made any difference. The car got parked on the side of the shop until I could mess with it again, and there it sat, under a tree, covered in leaves and pine needles, growing mildew in the interior, and generally being a prime example of the effects of entropy for 6 years!

About a year ago, that shop closed up and I had to move my car. I brought it to my house, pulled the 393 out, washed the car, and started assessing the damage. First thing I did was pull the 393 apart to find out what went wrong. It turns out when I sent it out to get bored .030" over, they only bored it .020" over, and I never bothered to measure the cylinder bore, so it scored the hell out of the brand new pistons and the cylinder walls. When I was putting the motor together, I did have to file all the piston rings to get a good gap, but I didn't think much of it at the time. Anyway, that was my oil control problem, as well as why it had such good compression while still burning a bunch of oil. Somewhere in the interim, I had scored a good deal on a Dart block 427" Windsor shortblock, and separately a set of re-done Pro-comp heads, a comp cam, and a Trick-Flow R intake that had all made 430hp to the wheels on a 408W in a Mustang, so that is all put together and sitting in my garage at home, and will be going into the Cougar. Still not sure what I'll do with the 393, but I did have the bore fixed, and bought all the parts to put it back together. On to assessing the rest of the damage from sitting. I brought the car to the shop and started pulling everything apart. The interior is completely trashed and covered in mildew. The dash is probably salvageable, but the seats, carpet, and headliner are all done. Both doors are completely rotted out along the bottom. The left rocker was starting to bubble in a few places, so that has been cut out and will be replaced with new metal. Luckily the inner rocker structure is completely undamaged. There is a small rust hole behind the right fender where all the dirt and crap accumulates. The passenger side rear floorpan has a bunch of small holes and will have to be sectioned. There is a rust hole at the right hinge pillar up near where the ECM mounts, there is a small hole in the same location on the left side, and probably the most serious problem is the left aprin and upper rail, as well as the left side of the rad support are rotted out. It turns out that high end body shop never restored corrosion protection between the panels, drilled holes in the rad support to pull it, and just covered everything in body filler hoping nobody would notice! A few phone calls today, and I found literally the last new aprin assembly in the country, so $550 including shipping, and it is on its way to me. I'll be on the lookout for a rust-free parts car to get the doors, driver's rocker, rad support, and the panel behind the right fender. This type of structural body work is also well above my comfort level, so I'll be calling in some favors and writing some big checks to get that fixed, but once it is all done, the car should be solid again, and then the car will get POR-15 on every inner panel so I never have to deal with this again, then paint, re-assembly, and hopefully have a crazy small block for powered Cougar. Anyway, here are some current pics. I'll have to dig up some old ones for everyone too.


Left upper rail where the rear aprin mounts rusted out


Rear aprin partially cut out. This is looking at where the firewall meets the aprin from outside the driver's side


Heavy rust pitting where the front aprin meets the shock tower


Holes drilled in rad support to pull it, and rad support rusted out. This is behind where the left headlight would mount.


Compromised crush zone in LF that the body shop just covered up with filler.


Area where right upper rail meets the firewall, as viewed from outside the passenger side


Same as above, but viewed from inside the car with the dash and HVAC box removed


Hole at the bottom behind where the right fender would mount.


Driver's rocker cut out


Bunch of small holes in RR floorboard


Little bit in the channel in the right front floorboard


As of now, I probably have about 8 hours of time into just taking everything apart and assessing the rust, not counting removing the engine, which is probably another 6 hours, plus the $550 spent for the new aprin. I'll keep everyone updated on the rust repair and how much time and money it winds up costing me, this way everyone else will know why they shouldn't do what I'm about to do!
 
October 28, 2014
So UPS freight showed up today with a big box from Kansas


Open it up to find my aprin


Only problem is the picture and description made it sound like it came with the upper rail and not the lower (which I don't need), but it turns out it comes with the lower and not the upper. A buddy of mine gave me a line on someone who may be willing and able to do the work, so I'm going to give him a call tomorrow and have him look at it to see what he thinks about whether I should get a new upper rail, or if it would be easier for him to just patch the rusted area.
 
December 28, 2014
Not a whole lot of progress. I'm still trying to find someone who is both qualified and willing to do the structural rust repair. I have one friend who I know could do it right, but he has nowhere to do it, and he was supposed to be buying a house with a large garage where he said he could do it, but that deal has been held up due to title issues. 2 other people came and looked at it, one said he didn't want to get involved, and the other said he would get back to me and never did. There was one other person who came highly reccomended, and who had sectioned a rusted out rail on a customer's 72 Challenger, and he said he was going to come look at it several times, but never did. Now I have a line on another person who is supposed to come and look at it, but with the holidays, he hasn't had time, so the car is kind of stuck in limbo while I try to find someone able and willing to do it.
 
March 14th 2015
Not a lot of progress, but a little bit made today. I spent probably 6 hours on it today and I got the driver's side rocker and the one spot on the quarter patched. I still need to do some more grinding and welding on it, but I ran out of grinding discs. I was originally trying to save the seam line from the rocker to the quarter, but some of the metal was too thin to weld to, so I ended up just cutting it back, spraying some rustoleum on everything inside, and then welding the top seam directly to the quarter panel. I'll fill the seam on the other side too, so once it is done, only someone intimately familiar with MN12s will notice.


I had cut some patch panels off a car that someone on SCCoA was parting out, however when I looked at the driver's side rocker patch I had cut off, it wasn't in much better shape than what I was replacing.


The local metal supply store isn't open on weekends, and home depot didn't have any 18 gauge steel (just 16 or 22), and since the driver's door needs to be replaced anyway due to rust along the bottom, I cut a piece out of it to make my patch panel for the rocker.


I also cut out the rusted area of the passenger side rear floor and trimmed the patch panel for that to slightly larger than the area cut out. The spot on the rear floor will be held in place with some panel bond (which I need to buy).


I also might have a line on someone willing and able to deal with the structural work on the front end. A friend of mine gave me a contact who was supposed to come and look at it one day this week, but couldn't make it, so I'll have to call him again and see when he can get out here and take a look.
 
March 14, 2015
The car was originally metallic red. I painted it black in 2000, and I painted the door jambs, inside of the trunk, and the engine bay at the same time, since I didn't want it to look like a color change. This time, it will be going even farther since the car is basically stripped down to a shell now, and all the insides will be painted before putting anything back together. As for the sound deadening, there is no sound deadening in the rocker area, since that is basically sealed off once it is installed. The only access to the backside of the rocker for restoring corrosion protection is through the holes for the sill plate in the driver's door area, so I'll be spraying copious amounts of cavity wax in there to keep this from happening again. If you are looking to remove your sound deadening, all of it can be accessed through the rear speaker hole inside the car. That was also done to this car back in 2000, and I think that is why the rockers are in as good shape as they are!
 
March 28, 2015
Progress!

So I finally found someone qualified and willing to tackle the rust repair on the car. Up until last year, this guy owned an auto body and restoration shop with his brother, but due to issues working with family, they closed up at the end of last year. He came a couple weeks ago and took a look at everything, said it would be no problem and he has rebuilt much worse, and showed me pictures of a 74 Mercury Comet he recently repaired that the whole front structure was rusted beyond repair, so he fabricated new rails and pieces of the shock towers. Anyway I didn't want to update this until I knew for sure he would actually show up, since I have had no luck so far getting someone to tackle this, but he showed up today and worked on the car in my shop while I was doing a customer's car. He is billing me $30/hr for however long it takes, which I consider to be an absolute bargain, and I'll probably have him do all the body-work and paint on the car. Watching this guy work was amazing. He jumped right in, and inside of half an hour he had the old rad support off the car. He plugged away all day, cutting, trimming, and fabricating patch panels, and by the end of 8 hours, all the front structure rust was cut out, the appropriate patch panels were cut from the new aprin I bought, the used rad support I got to replace my rusted out one was trimmed and lined up, and the patch panel for the rusted out section on the upper rail was fabricated, and all of those pieces were mocked up and clamped in place with vice grips. He is going to be coming back after work every night this week, and he suspects that all the rust repair will be done this week! Without further ado, here are the pics I snapped during the day as he was working.

Before he got here, I pulled the doors off, removed all the suspension, and dropped the front subframe out of the way.


Some of the rust on the aprin that was hiding behind the rad support


The rust on the upper rail behind the shock tower


Rusted area cut out


New patch panel made


Mocking up the new front aprin


Rad support mocked up, and lines up perfectly with the factory spot weld locations


March 29, 2015
Honestly, I haven't looked at the rear shock towers from inside the car, but there is no evidence of rust from the outside. Now you have me worried about that! The floor pan needs a couple patches, one at the passenger side rear footwell, which I have a picture of that all cut out and the patch panel fit, but not welded in, and it also need a section of the front floor in the channel that runs along the outside near the rocker. The driver's rear floorpan is fine, and the driver's front floorpan I sectioned a piece in back when I put the 393 in the car.
 
April 1, 2015
More progress

So the body man came back yesterday and plugged away on the car for another 4 hours. The whole front structure is all welded back together, except for a few spot welds on the front of the rad support that still need to be done. He will be coming back on Thursday to finish that, and continue with the other work. After that, we just need to strip the peeling paint from the engine bay, prep it, and respray it, and then I'll be able to get the motor and front suspension installed.

Rear section of the aprin (between the driver's shock tower and firewall) installed


Front section of the aprin (under the battery tray) installed


All welded together

 
April 28, 2015
Some more progress! The guy doing the body work has been coming by as he has time, basically spending 3-4 hours a night a couple nights a week on the car.

Since this car will not be getting AC re-installed, I had him patch the hole in the firewall where the AC lines came through.


All the new panels are welded up, and the whole engine bay was stripped with a wire wheel


All cleaned up and masked


Engine bay getting primed


Next step is a spreading seam-sealer, then painting the engine bay, then the subframe, motor, and suspension can get re-installed. The engine bay is going to be done in a semi-gloss black, and the wheel wells and underbody areas are going to get sprayed with a black bedliner material to prevent any issues down the road.

I've also been thinking about paint options for the exterior. I've pretty much decided that the stripes and "eliminator" lettering should be a darker color than they were. My aunt recently bought a 2015 Ford Edge that is a dark gray metallic (ford calls the color Magnetic), and I think I'll use that color as the secondary one, which should be more subtle against the black. I'm also debating the stripes and trying to integrate the eliminator lettering into a stripe down the side, but then the stripes along the top would make it too busy, so now I'm thinking maybe some kind of side stripe, and then just use the same color on the hood where it leads into the scoops on the Mach1 style hood. Any thoughts or ideas on what to do with this would be appreciated.
 
April 30, 2015

I'm kind of liking this! I'm not sure how it will look with silver stripes on a black car, but it should be worth at least taping it out to see.

The interior isn't going to be anything crazy. The car originally had gray interior, and it will be going back together with a combination of gray and black. I have a very clean crack-free black dash, and some nice black cloth early style SC seats that will be going back in. I also have a nice pair of gray door panels with some nice black inserts that match the cloth seats. I also picked up a nice shape black carpet for it, and I have to re-upholster my headliner, which will stay gray. I just have to figure out how to get the sunroof visor out to re-cover that!
 
May 25, 2015
Spraying some paint...

On the underhood area at least. He also went through with seam sealer and sealed most of the areas in the engine bay to prevent any moisture from getting between the panels.
DCE38200-497B-4C90-9FEB-816FB4456B02-3710-0000034EBCCE9D57_zpsnguzvd59.jpg

AED818CE-6DFA-4507-9C9D-0B84DF21D06C-3710-0000034EBDF200F1_zps056fq7li.jpg

595ED9DA-C2FA-4CEE-B0C2-029EB25DAC57-3710-0000034EBEFD3B4B_zpsgpkmg8us.jpg

A6EA6256-CCA4-49DA-B770-375C5B12EDF2-3710-0000034EC14CF8AF_zpsndkwxvkk.jpg

9760C876-1AE7-439E-97F5-2FF5EBC8FF22-3710-0000034EC25A9587_zps1zp8n74o.jpg

04C4BE05-7492-44B6-A94F-A1FA4EC78BA9-3710-0000034EC31F5959_zpsjy44t1mm.jpg

12B48967-EB11-4F7F-8704-2355A7EC03D2-3710-0000034EC43E1DC5_zpsurm0y8c8.jpg


I went with a semi-gloss clear for the underhood area.

I also pulled the rear suspension from a MarkVIII I was parting out and got the rear subframe stripped.
788120D8-F780-43AE-8C99-8FC6206C84B2-3710-0000034EC0099C27_zpsbo4r5jgt.jpg

I need to wire-wheel and paint both subframes now. I also have a set of UHMW subframe bushings and the stainless steel strut rod sleeves coming from Jay Richmond. I found some new OEM front strut rod bushings at a few different sources and ordered them up too, and then I have a set of rear spindles and LCAs off another MarkVIII assembled with Dave Dalke's version of the delrin rear bushings, I just need to press new bearings into them and get a set of hubs redrilled.
F02C9B01-22BF-4A64-BAE4-89EC72B2C6C3-3710-0000035617196FC8_zps3qdshn5j.jpg

Then some SC sprngs and Tokico Blues
77A2FAA6-D2AF-4375-BFA3-8F2EDFEACB64-3710-000003561939513F_zps3vooxtot.jpg

3B4DB8EF-9847-4793-A15E-40B2745F6F89-3710-000003561B0E0A06_zpsfwkuiliw.jpg
1694743543507.gif
 
June 8, 2015
haven't made much progress on this recently, been busy with other stuff and right now I'm waiting on some new rear subframe bushings and stainless steel strut rod sleeves to come in from Jay Richmond, then I can start putting the suspension back together. I cleaned and primed the front subframe, but I don't have any pics yet. That has to get painted, then the front suspension will go back together, and then I can put the front end back on the ground and drop the new motor in.
 
August 16, 2015
We have front suspension!
C9BE9128-06A7-4E1B-9AEF-A390D9882343-4938-000005453D6FBEE9_zpst9ievhki.jpg


Just waiting on some brake parts to arrive now, and the car will be able to roll once again!
 
August 25, 2015
So not a whole lot of progress, but little steps. Front suspension is completely back together, including 13" Cobra brakes installed, and I was able to drop the nose on the ground. I also re-installed the heater box, and I got new rear wheel bearings and 99 Cobra rear hubs pressed into the rear spindles. Rear suspension rebuild is going to wait until I can get it on the lift though. At this point, I'm waiting on a firewall seal for the steering shaft and a new brake booster to come in, then I can finish bolting everything back to the firewall and re-install the dash.

FBE72D61-8BCD-492A-B529-9F0F8D7F2EE0-1117-0000013288B95534_zpsxdsxzeja.jpg

2DAD0834-F754-4336-9B6A-2E91C55D2304-1117-000001328D558369_zpscdgu4m1a.jpg
1694743766908.gif
 
October 20, 2015
Minor updates, nothing major yet. My body guy has been kind of scarce due to being very busy at work, and he is also looking for a house, but he is supposed to be coming this Saturday to finish up the rust repair on the floorpan. Once that is done, I can paint the floor with bedliner to make sure I never have any rust there again, while also likely giving me some sound deadening and heat insulation. In the meantime, I have been doing little detail things. All the underhood wiring harnesses got pulled apart, trimmed of what I don't need, and re-taped. I got a new brake booster and master painted and installed. The battery tray, underhood fuse box, and washer and radiator reservoirs got cleaned up as best I could, and then I got the engine painted, and I am working on painting the headers right now.
3E7250E6-F74A-4ACE-96F2-93B84FCE4226_zps7kxkacxt.jpg

3C0C6FEE-33BD-464A-B814-902962DEC028_zpsiirrwq5q.jpg

F8A3ECDE-3430-4E26-B6E2-9814115CCD2D_zpsvdanko5v.jpg

3F4568CA-B216-45BF-983B-41ED47FE6F61_zpsn9ytxjjq.jpg

B99D05C5-8BDB-45AE-81B4-E1F112EB2057_zps1y6pmtxv.jpg

D3E47D26-0DE8-4E76-B6B6-CAF111464268_zpsqwdz1kcv.jpg

146349EE-E159-48B1-BDCE-26638FF6281C_zpsfl7pahuo.jpg
1694743865731.gif
 
October 21 2015
Headers are painted. They look pretty good now, we'll see how they hold up. I've never had much luck with the ultra high heat paints because you are supposed to bake them, and I don't have an oven large enough to, and I have never been able to accurately reproduce the heat cycles they want you to to bake them on the car. A buddy of mine suggested bar-b-q grille paint, and said he did his own headers silver that way, using basically an entire can on each header, and they are still silver almost a year later, so I figured I gave it a try. It says it holds up to 1200F, and doesn't require any special baking procedure. Honestly, I really don't care how they look since you can barely see them, I just don't want them rusting out. Anyone know how hot headers typically get?

 
October 25, 2015
The floor is completely patched now, and my car body is rust-free!
Right rear floor section went from this

to this


And the spot in the right front floor

now looks like this


Now to spray the floor and start putting the interior back into the car.
 
December 7, 2015
Been busy with work, and haven't had much time to mess with the car until today.


Hood clearance might be an issue
 
December 8, 2015
Test fit the hood today, and it won't clear the intake. I'm not exactly sure by how much because I don't want to cut a hole in that hood just yet. I ordered a separate fiberglass scoop that is kind of like an SVO scoop, and before I cut a hole in this one, I'm going to see how that would look grafted onto the Mach1 hood. If it looks OK, then I'll glass that in for the added clearance, but if not, I'll order the cowl hood for it.

Oh, and as for the hood pins, I would much rather have pins than have my hood come up at the triple digit speeds this car will be traveling!
 
July 4, 2016
Yeah, things got stalled for a while. Basically there was a little bit of rust repair left to do, and the awesomely talented affordable body man that I had found dropped off the face of the earth. He hasn't returned my calls or texts, the mutual friend of ours who referred him to me has not been able to get a hold of him, and apparently the guy has even had sparse and minimal contact with his own family. Not sure what his deal is, but as you will see from the pics below, I really haven't been able to do much until that part gets finished. In any event, the friend who referred him to me is actually who I had initially approached to do the work, but at the time he said that he didn't have the time to do it because he had just bought a house that needed quite a bit of work. Recently, the house is starting to come together, and then he blew an engine in his S10 pickup, so we arranged a barter deal where he will finish the needed body work and rust repair, and I will swap an engine in his truck for him. The last bit that was waiting to be done was the driver's side hinge pillar. There were a few small rust holes poking through around where the center fender bracket goes, so I decided to cut out a square and see what was back behind there.


Clearly not good! The stupid foam back there had absorbed moisture and rusted out the hinge pillar from the inside. All the rusty old metal had to go!


Now this left me with a problem. I had found the last new aprin assembly in the country, but try as I might, I could not track down a new hinge pillar, and obviously one off another car would first off likely get destroyed removing it, but also probably wouldn't be in any better shape, and fabricating that complex shape would be very difficult. As I looked around the shop pondering what to do, I saw my answer!

The old door from the car provides again! Since the shape of the hinge pillar in that area is designed to contour around the door when it closes, the bottom front of the door has the exact same shape.

It wouldn't cover the whole area I had to cut out though because beyond that point it gets into the area of the door under the door panel, so I cut another piece out of the skin to make the rest of the patch.


And the 2 pieces tacked together and mocked up in place.


At this point I stopped. My welding is adequate for re-attaching something that broke, or doing exhaust work, but for something that will need to be ground flat and where warping the metal is a concern, I don't trust myself to do a good enough job. Just this past weekend, my friend Chris, who was the one that referred Joe to me (Joe is the guy who did great work then disappeared), came over and assessed everything, ground down my not-so-pretty weld on the patch panel, and sprayed what he could see behind there with rust converter and weld-through primer. Within the next couple weeks, he will come finish up the hinge pillar repair, and then I can get a dashboard back in the car to make it at least steerable again. At that point, in my spare time I can re-do the rear suspension, spray bedliner on the whole undercarriage, get the transmission, wiring, and most of the interior re-installed, and take care of the fuel system and some other minor issues, and then that will only leave final body work and paint. Obviously at this point, the goal of being able to drive it this summer is not happening, but I'll keep plugging along, and hope to have the car done by the time next summer rolls around.
 
August 21, 2016
I have a manual trans in everything I own, and this car will be no exception. The 5-speed conversion was done back when I put the 393 in the car.

There has been some minor progress made. The hinge pillar is now welded back in, smoothed out, and primed, but the guy doing it forgot to weld the lower fender bracket in place, so part of it will have to be ground back down to be able to weld that in. After that, we are going to hang the doors so we can bolt the hinges down in the right place, then pull the doors back off and paint the door jambs.


March 26, 2019
The car is sitting in my garage. The guy who was doing the body work for me dropped off the face of the earth. A buddy of mine who used to be a painter said he would help, and he did a few things, but then just has never had time. I have been running my shop, and haven't had time to do anything with it, so it has sat. Eventually I'll probably wind up just dropping the car at a body shop to have the paint and body work completed, but I don't have the money for that right now, so the car has just been sitting.
 
June 9, 2022
Holy thread revival!

This car is coming back!

A couple months ago, the guy who did the body work way back when called me up. He had gotten too busy with work to continue at the time, and he just assumed I got someone else to finish it up, so he never followed up. Now he has quit his job and built a shop behind his house to do custom body work, and he does one car at a time, and asked if I wanted him to finish it up He came to my house to re-assess the condition of the car, and about 3 weeks ago, we towed it down to his house. What he has done so far since it has been there;

-Repair last remaining minor rust at back of both rocker panels

-Hung and aligned the doors and fenders

-Minor body work needed on one door and one fender. Both doors were already in primer and the fenders he stripped to bare metal, repaired some minor damage to one, and then shaved the antenna hole on the other

-Entire car stripped to bare metal, all dings and dents fixed

-For the Mustang quarter scoops, I wanted to keep them, but also upgrade from the V6 style to the 01-04 V8 style, and do a better job of it. He went to the junkyard and cut out the sections of the Mustang quarter panels where the scoop attaches, and grafted those in, so now the scoops attach and can be removed like factory.

-The rear glass has been removed, thankfully in one piece. The seams between the quarter panels and the cross piece under the rear window were welded and shaved, and the bottom of the window opening was filled in by about 3/8”. This makes the window sit perfectly in the opening with no rubber molding, so the rear glass will be flush mounted with about a 3/16” gap all the way around.

-Last but not least was a custom spoiler. The side pieces are off another car, but had to be significantly modified, and then the center section is completely fabricated, and all pieces are still removable.

-We also converted to the 94-97 Cougar style roof moldings which I think are a much cleaner look.

At this point, the custom body work is pretty much done. The only other thing he will have to do is modify the hood, but we can’t do that until the engine is installed so we know how much higher it has to be raised to clear. Once he finishes everything with the body, he is going to spray it in black sealer and give it back to me to re-assemble everything, get it running, and drive it enough to work out all the bugs. Hopefully I can get some driving in on it this summer and fall, and get it back to him in the winter for final paint! Here’s all the pics I have so far.

015fd471-20eb-4a59-8750-9fdcf0f54107-jpeg.49202
934a0851-ad16-4464-a487-35974ece0090-jpeg.49203
23d1ae65-2b64-4403-b928-0525baf4e157-jpeg.49204
1a7fd72c-9d99-4bd3-b3a0-f7edb2e60bb5-jpeg.49205
9241b108-bd51-44ed-9228-eb91a54aaeae-jpeg.49206
6dca2352-a5c9-4c5b-a9a4-a7a219bc59f0-jpeg.49207
900a16fe-ae8e-4c77-b0fc-668db0291b20-jpeg.49208
67b6f3d6-343d-4cd8-96d0-90a3f95e0b65-jpeg.49209
333a64ff-19ff-4c81-bb22-bcdb6185f660-jpeg.49210
6188e186-7a4c-493a-8a3f-ba47fe2fe790-jpeg.49211
 
June 10, 2022
The main color is going to be Ford Tuxedo Black Metallic, which is black with kind of a gold metallic. The stripes/accents are going to be Ford Magnetic Metallic, which is a dark charcoal grey metallic.
 
July 10, 2022
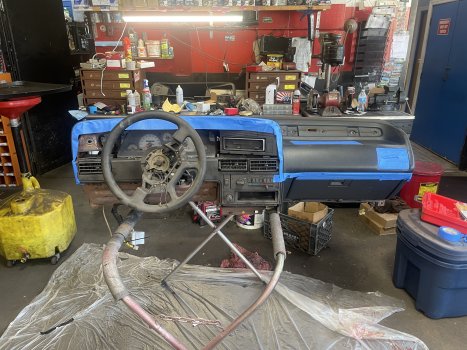
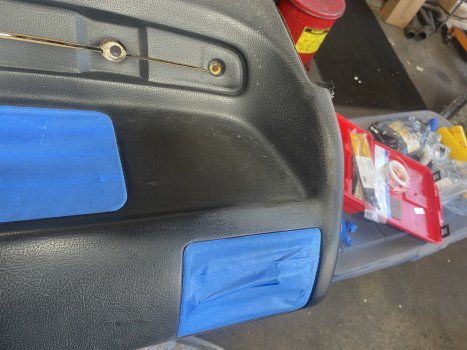
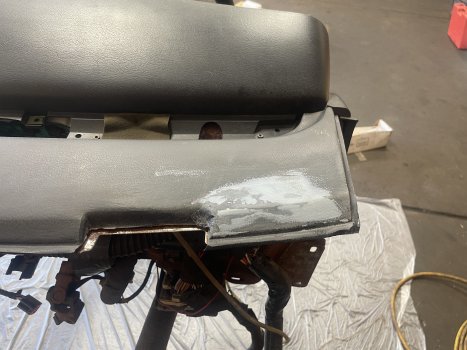
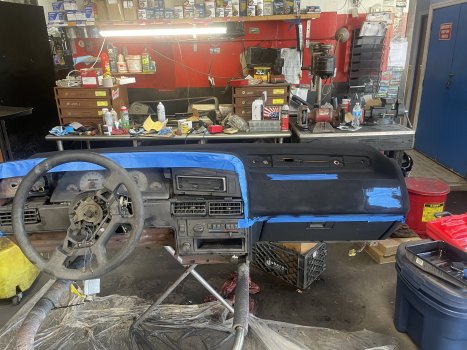
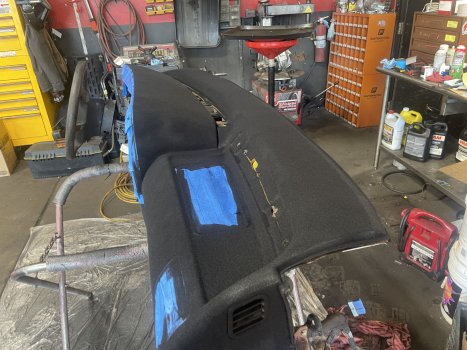
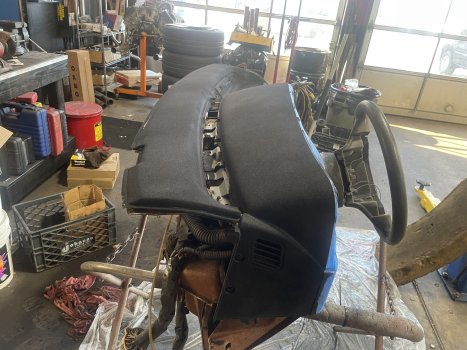
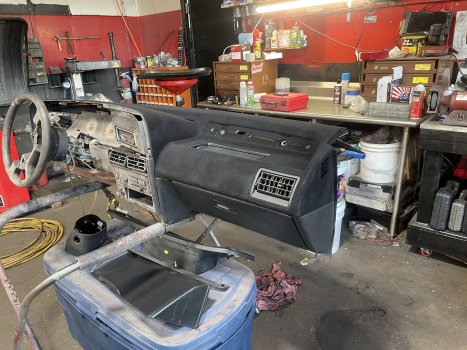
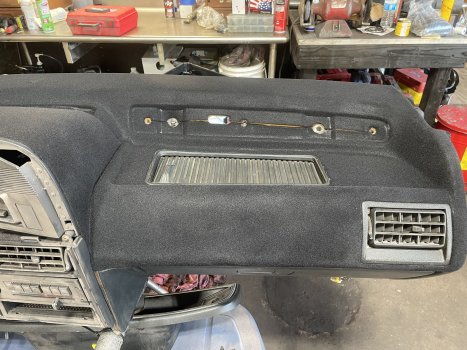
Time for an update on this! I got the car back from the body guy this past week. All the body work is done, the jambs and trim are edged out, and the car was sprayed in flat black sealer. The hood has not been touched yet, other than bolting it on and a cursory gap adjustment, because it is going to have to be modified to clear the engine. At this point, I have to get everything back together on the car, and then the goal is to drive it for a month or 2, work out any bugs, then give it back to him for final paint around November. As it sits right now, the car has no engine, transmission, or interior, and the suspension has to be rebuilt, new brake lines and fuel lines run, and I’m sure a ton of other things that need to be redone. Today’s project though was fixing the dash. The black 90 dash that I pulled out of the car many years ago was crack-free when I put it into storage 8 years ago, but in the meantime developed 2 small cracks, one on the passenger side top by the glove box, and one on the driver’s side by the VIN plate Today’s project was to fix those cracks and flock the dashboard, and I’m quite happy with how it came out!
freddy1.jpegfreddy2.jpegfreddy3.jpegfreddy4.jpegfreddy5.jpegfreddy6.jpegfreddy7.jpegfreddy8.jpeg
 
July 10, 2022
Some more pics of the car as it sits now. I did something a little different with the mirrors to get them away from the body a bit. My main reason for doing this is a functional one (factory mirrors create a low pressure zone that wreaks havoc with the windows at 150+mph) more than an aesthetic one (factory mirrors still look more “right” to me), but I’m pretty happy with the look of it. The flush-mounted rear glass also looks a million times better than the wrinkled and dried up old rubber molding!
dcf5c21e-d7f2-410d-a7ce-64f76ec29f42-jpeg.49796
3f6843ae-ae5f-489e-a428-3debcecbc22b-jpeg.49797
246bb470-1505-4a5f-a145-d84e9067f772-jpeg.49798
55fca319-7f31-4b3f-9185-f0ac5dc028f3-jpeg.49799
19a62536-506d-442d-af25-dc241221a37d-jpeg.49800
4f4e1674-66ac-4c89-8dc0-1db9bd540a50-jpeg.49801
 
July 11, 2022
The mirrors are off a Mazda RX8. Basically the base of the mirror had to be cut off, then he grafted on the MN12 mirror base plate, and he used some 5/16” threaded rod going through everything that is held into the mirror assembly with panel-bond adhesive, and then the whole thing was plastic-welded then smoothed out with body filler. It was quite a lot of work! The reason the mirrors cause issues at high speed is because there is no air-flow between the mirror and the door, so the mirror creates a low-pressure area on the door glass. Under normal driving conditions, it is a non-issue, but at 150+, it is enough to pull the top back of the door away from the body and make a hellacious wind noise. By having the mirror stand off from the door, hopefully the air-flow will be more laminar across the door and cut down on that effect. This is why supercars have their mirrors poking way the hell out away from the body in the middle of nowhere.
 
I too have had the shit scared out of me, by the window suddenly fluttering. Having the moonroof pop open at speed can be disconcerting too. :)
That is truly a labor of love, and you have done it right. I saw 'eliminator' stripe kits awhile back on ebay, but they were all black.
 

Similar threads

Back
Top